For a trip to Hawaii, you want to capture the beautiful scenery with the best possible images. I was able to borrow the Fujifilm GFX-50R, which considering its size and weight, might not be anyone’s first choice for travel. However, the photos speak for themselves.
The big deal here is the sensor – 51 Mp, on a medium format sensor – full frame is 36x24mm, medium format is about 70% larger, just shy of 44x33mm. This is the same Bayer sensor used in the GFX 50S. Compared to 35mm, it has a crop factor of decimal eight.
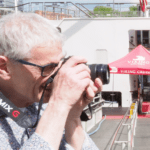
Let me give you a quick tour of the outside, go over a few configuration settings and take some photos. It is weatherproof, and specked to -10C which was the weather we left behind in Toronto. It is large, in every dimension, it’s larger than a DSLR. It’s a mirrorless design that’s practical more than stylish, and evokes rangefinder cameras from the previous millennium. The body is magnesium alloy with aluminum dials.
The 50R (I guess R means rangefinder) uses the Fujifilm G mount, which has a 65mm diameter opening exposing the sensor. Fujifilm sent it over with the Fujinon GF 32-64mm zoom lens – the 35mm equivalent of 25-50, a field of view 81 to 43 degrees. The 50R tips the scale at 775 grams with battery and memory card, slightly less than its 50S sister. Add the 32-64 zoom lens (875gm) and the 50R totals over 1.6 kilos. That’s the price of quality.
If you’d like to check the price, or purchase the Fujifilm GFX-50R, the affiliate links below will take you to B&H Photo. You will pay the same low price, and I’ll get a small commission.
B&H Link to Fujifilm GFX-50R 32-64 Kit
A substantial strap is included. But the front grip seems small for camera. The thumb grip, on the back, is more suitable. And clearly, this camera is designed for a commercial fashion or portrait photographer. I’ve brought it along on this trip to Hawaii to capture some landscapes.


Lens
The lens has an unmarked focus ring, a marked defined travel zoom ring and an aperture ring – a constant F4 to F32, along with an auto aperture position, a C position, to use the camera’s command dial to set the aperture and a key to release Auto mode – so you don’t accidentally dial from 32 to auto. Filter diameter is 77mm, closest focus is 50cm.
Screens, Controls and Ports
The electronic viewfinder is to the left of the lens, which keeps the noses of right-eyed shooters off the LCD. On the left, a diopter, which adjusts enough to suit my prescription. Pull it out, adjust and lock it in place. It’s a bright and clear 3.7K dot OLED screen. The LCD is an 8 cm (3.2in) 2.4K dot screen, which tilts all the way up and half way down. It is a touch screen. Touch can be used to focus but not snap. Four flick or swipe motions access customizable control settings. Left for film simulation, right for white balance. It works as a touch pad to select focus while shooting with the viewfinder.
Although the controls are similar to other Fujifilm models, it’s different enough to be fairly unique. There’s a nice touch here – when you flip the screen up, the viewfinder becomes inactive, so the LCD doesn’t black out when you get too close. That’s appreciated. The focus switch with single, continuous and manual choices is on the back.
The back dial is familiar, but its companion front dial surrounds the shutter button, by default, it selects the ISO. That was accidentally adjusted more than once, so I reassigned it. At first, this seemed awkward, but I quickly adjusted. The ability to set the aperture with the lens ring using my left hand and the ISO with the right while watching the histogram in the viewfinder is a truly useful control configuration.
Then, when I want to adjust the shutter speed, my thumb finds it easily. There’s a small on/off switch – although it’s in the same place as other Fujifim cameras, it’s not part of the shutter release. Somehow, all of the switches and keys feel small compared to the size of the camera.
On the top right panel, the shutter speed dial, with a push to lock button, and the exposure compensation dial as well as two small keys, one for drive settings the other unlabelled, defaults to the on-screen ISO menu. The upper panel on the back has the LCD view mode selector, the delete key, and two more unlabelled function keys. The left is exposure lock, the right focus lock. Of course, these can all be customized.
The thumb grip has another unlabelled key- by default focus area, and the Q menu key. I found this an awkward position. The wide open space of the right side back panel has a joystick for focus selection and menu navigation – interestingly, there’s no control pad. I missed it for the first day or so, but quickly transitioned to using the joystick, which is responsive and easy to manage.
Underneath, the menu, review and display keys. There’s one more unlabelled function key in front. There’s a flash hot shoe on top, but no included flash. The GFX-50R has two SD card slots, they’re UHS-2 compliant.
There’s a dual mic/remote connector on the left side, and HDMI on the right. You’ll be forgiven for nearly missing the USB C-type connector on the bottom, where you’ll also find a 15v DC power in. Fujifilm supplies a cable protector to prevent accidental disconnects, but no cables.
The menu will seem familiar to most who’ve used recent Fujifilm X series cameras. This review was recorded with firmware 1.0, the latest available.
Of course, the first thing it wants to do is pair with my phone. That enables it to set the time, as well as capture GPS location information. Some Fujifilm cameras, like the X-H1 now update firmware directly from the app – I’m finding that a very handy feature. Fujifilm says that works with the 50R too.
Settings and Exposure
I reset from the defaults to superfine jpeg plus raw. The superfine setting uses a lower compression ratio than fine. I decided to use lossless compressed for the RAW files. I bumped the focus points from 117 to 425
And set face/eye auto on. I set the shutter to mechanical. Then configured the AutoISO. One is 1600 with 1/60th; Two 6400 with 1/125th; Three 6400 with 1/60th. My default is two, so that’s where I leave it.
In the setup, I turned the image display on to 1.5 seconds. In display custom settings I added the level, histogram and highlight alert. And now I’m ready to go shooting. With the shutter and aperture at A, the lower left of the display shows P, for program mode.
For most of my shooting, I set the aperture ring to F4 and the shutter dial to A – now the lower left shows A for aperture priority. For shutter priority, I set the shutter and return the aperture ring to A – But I find it easier to leave the aperture and set the shutter as needed, which is M for manual – but the AutoISO stills manages the exposure for me.
Using the dial, shutter can be set from 1 second the 1/4000. With the T setting, use the rear dial to set exposures from one and one third seconds up to 60 seconds and then with decreasing granularity up to 60 minutes. Bulb mode – the shutter stays open as long as it’s pressed – can also be used up to 60 minutes. Incidentally, the shutter dial works in 1 stop increments. Use the rear dial for 1 third and 2/3rds stop up and down from the setting.
In aperture and shutter priority the exposure compensation can be set, using the dedicated dial on top. The setting is displayed screen left. There’s a three stop range. But turn the dial around to C, and press the front function button to access a five stop EV range with the front dial. Press the button again to return the dial to ISO. That can be set from 100 to 12,800. Use the meter and the histogram to assist with manual exposure. Incidentally, assign histogram to a function key for an easter egg – an RGB version – but there should be one more option once it’s assigned to a key – off. I’d suggest you use the default for this, which is the touch swipe up but it rarely works for me. Left and right are more reliable.
Face detect over-rides the meter mode selection. The menu calls meter selection photometry, and like other dimmed selections, the selector skips over it. I’d appreciate a help dialog that indicated why it’s not available.
With face detect off, the selections are multi, centre-weighted, spot, which can be interlocked with the focus spot – and average.
Below ISO 100, there’s a low setting equivalent to 50. Above 12,800 there are three high settings – 25,600, 51,200 and 102,400. I would suggest that if you’ve bought the 50R, that’s not a compromise you’re willing to make. I found 6400 to be quite usable, even 12.8 works for a dark scene, but my tolerance is reached at 25.6, and 51.2 is too mushy to consider.
Focus
The switch on the back selects the focus mode – single, continuous and manual. The function button on the thumb grip opens the area selection – single, zone and wide. Hopefully, a firmware upgrade will add “ALL”, available on other recent Fujifilm models and super useful. With single, press the joystick to set the focus point, select the size – there are six – with the back dial. Press the joystick to return to centre. Of course, touch – use the right on-screen button – is also an option. The 50-R uses contrast detection for focus.
The zone selection – which can be sized to 3×3, 5×5 or 7×7 on the 117 point grid – is also movable. Wide, or auto area also used the 117 point grid, typically focussing on the closest contrasty object. Switch to continuous, and wide becomes tracking.
With its high resolution and shallow depth of field, the 50-R requires an exacting attention to focus, and provides several manual focus assists. In manual focus mode, an on-screen distance ruler indicates the focus plane distance, and also the depth of field, as indicated by the blue area. Press the rear dial to punch in to an expanded view, use the joystick to move the expanded area. Or hold the rear dial to switch to peaking, displaying the edges of the object in focus. The menu has colour and sensitivity options for peaking.
There are two options if you want to speed up focus. There’s rapid AF – according to the manual, this speeds focussing but reduces display quality temporarily.
Pre-AF is a continuous focus mode – the camera never stops focussing. There is a focus bracket feature, which requires a little trial and error to determine the right number of images to take for your scene. It’s useful for macro work, either to find the exactly right focus spot, or to combine the images for a focus stack in Photoshop.
Colour and white balance
Touch swipe right for white balance … auto, the usual presets, kelvin settings from 2500 to 10 thousand. Capturing a custom white balance – there are three slots to save them – is as easy as pointing the camera at a grey card. The presets and custom settings can be interactively fine-tuned across the red/green and blue/amber axes.
Once you have your white balance, swipe left to select a film simulation. These are Fujifilm’s custom colour profiles, digitally emulating colour film types – as well as Acros – a black and white film, customizable with three colour filters. There’s a standard mono, also with filters, as well as a sepia simulation. If there is a reason to select a Fujifilm camera over the competition, this is it. I’m going to show you in camera JPEG images taken with the simulations, viewed at 1:1. These subtle variations in colour reproduction can help define an image and create a mood. I can’t do justice to this feature in a video. And there’s no point in judging them on a single image or using the same lighting – each has attributes which lend themselves to specific scenes.
Press the Q menu for further fine-tuning to highlights, shadows, colour and sharpness – although these are not interactive and don’t provide much latitude. Further highlight and shadow adjustments can be made with the Dynamic Range setting can be set to 200 with ISOs 200 and up, and 400 with 400 and up. No worries if you’re using AutoISO.
On the menu you’ll also find a grain effect, you’ll have to look closely to see it. And the colour chrome effect, which provides weak and strong enhancement to colour in shadows. The increased colour depth here creates a richer and more detailed image.
Shutter and drive
The 50 R uses a focal plane shutter – you can see and hear it in this one second exposure, using the mechanical shutter. The electronic shutter is silent, and increases the top shutter speed to 1/16,000, but limits the ISO from 100 to 12,800. Depending on the speed of the object and the shutter, there may be image shear on objects moving across the shutter plane.The electronic front curtain setting uses the mechanical shutter up to 1/640, then reverts to mechanical. With the mechanical front off – it looks and sounds like this. If you find the full mechanical a little clunky, try this setting. Mechanical plus electronic allows the full range of shutter speeds up to 1/16000, and switches to electronic as needed. The last setting combines the last two settings in one. It’s the most versatile, unless, like me, you like old school sensation of the full mechanical operation.
The top panel’s drive key opens the drive mode menu to access burst and bracket modes as well as multi-exposure and video. As you might expect, these are not industry-leading continuous speeds. Using the mechanical shutter with all manual settings, the 50R captures 3 superfine JPEGS per seconds for fifteen seconds, slowing to just under 2 per. Between the slow refresh and the blackout, it’s difficult to follow moving subjects. The silent electronic shutter takes slightly less than two per second.
Including focus bracket, there are six bracket modes – exposure, ISO, film simulation, white balance and dynamic range. The exposure bracket can take up to nine images, with a range up to 3 stops. Check the graph on the bottom to see that captures a 25 stop range. Interesting.
Multi-exposure – not sure how this feature made it in while Fujifilm expects you to do manual panoramas. The first image appears while you’re composing the second, that’s helpful, but there are no blending options and only two images are possible.
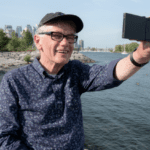
Not included on the drive menu is the self-timer. Ten or two second delay – and the hack here is it works with the continuous mode to take five consecutive images. Also not included with drive settings is the interval timer, and it’s pretty full featured. Interval from 1 second to 24 hours, and number of images can be set from 1 to 999 and infinity. Then set a start time and GO. If you intend to create a video from your timelapse images – use a smaller image setting like S 16×9 which is slightly larger than 4K video. Would be nice if this included a video output option.
Aspect
There are some aspect formats that you don’t usually find, pixel counts are displayed at the bottom of the screen, along with the number of images that can be saved on the remaining space on your SD card. 4×3 provides the largest resolution – the others are all less than 51Mp. There’s a 38Mp square mode – perfect for black and white portraits. As well as a super-wide 65×24 settings – 25Mp – useful in a camera that doesn’t have a panorama mode. But let’s face it, if you’re a photographer with a 50R, you’re taking multiple shots and stitching your panoramas, like I did here. Hidden in the shooting settings is a 35mm format mode, which uses the 36x24mm central area of the sensor for a 30 Mp image.
This can be useful when shooting with a 35mm lens using an adapter.
Video
Video seems an afterthought on this model. In spite of the 51 Mp sensor, the highest video resolution is HD – available at frame rates up to 30. That makes me wonder why video was even included. Recordings are limited to 30 minutes and are saved in 4GB chunks. Hopefully, a firmware upgrade will enable single file recordings. The 50R does support HDMI output of 60 frames to an external recorder.
The mic input is the non-standard micro size, you’ll find on-screen meters and an input level control setting.
Playback and Tethered Shooting
A full set of playback options includes a RAW conversion module with an extensive set of settings and options, including the ability to save TIFF files. There’s a voice memo feature, to save a note with an image.
One interesting capability is tethered shooting – the power and USB port seem to be specifically designed with that in mind. The 50R supports both Capture One and Lightroom as well as Fujifilm’s free X-Acquire desktop app. Switch the camera’s connection, PC connection to USB Tethered Auto. The app will recognize the camera and settings, and display thumbnails as photos are taken. Settings can customize the folder, and specific if you want RAW and or JPEG files copied.The app can also backup and restore camera settings to your PC.
Battery
While most Fujifilm cameras use the model 126 battery, the 50R uses a larger model 125 battery. A charger with interchangeable AC plug is included – along with the plugs you’ll need for most destinations. An optional battery grip holds one additional battery, and is useful for portrait mode shooting. There’s an interesting battery age display. A shutter counter would also be useful – to check if you’re approaching the 150,000 life cycle.
For those who need to know, both the camera and the lens say “Made in Japan”. But, as I say, I expect Fujifilm’s quality control to be the same wherever the camera is made. If you have questions or comments, I do enjoy interacting with you, so post your relevant questions and civil comments below. When you’re travelling, shoot until your memory card is full and your battery is empty.
If you’d like to check the price, or purchase the Fujifilm GFX-50R, the affiliate links below will take you to B&H Photo. You will pay the same low price, and I’ll get a small commission.