My review of the Blackmagic Pocket Cinema Camera 6K was challenging. At times fun, at others frustrating. In the review I wanted to provide a sense of the capability and quality this camera provides, but also the complications that may ensue.
Blackmagic’s agency set up a video conference with a product specialist before the camera arrived – but that did not prepare me for the challenges I was about to face.
There would also be time pressure, as Blackmagic’s agency required me to return the camera 14 days after it arrived – including the arrival and shipping days, so really only 12 days. When it arrived, I suggested that I could return it on day 15, the answer was a very clear “No”.
My intention was to produce the video at 4K DCI – 4096×2160 – at 24 frames. While I typically would only use the highest quality settings of a camera, the decision to shoot at 17×9 meant using a 17×9 sensor window (or crop) equivalent to 5.7K, as the full sensor provides 16×9. Most of the scenes were recorded at that setting which is available only with Blackmagic RAW. I used the Film dynamic range setting for the majority of scenes.
The first challenge was finding appropriate media without exceeding my production budget. That was difficult. Most cameras provide high quality output to HDMI, but the Bmpcc6k outputs only 1080 on HDMI.
I decided that an SSD drive would have usefulness beyond this review, as it had the best potential for re-use. The Samsung T5 drives listed as supported (and note that not all sizes of this model are listed) are no longer in production, as that model has been replaced by the T7, which is not listed. I thought that meant the list was not up-to-date, but that was an incorrect assumption. It would not record more than a few frames before quitting. I returned it.
I contemplated purchasing a supported CFast 2 card, but they are expensive and would not be easily re-used. At least my local dealer – the DV Shop in Toronto had some in stock, but the price stopped me. I already had a supported SD V90 card, but it is 32GB – which, at those settings, provide only 3 minutes of recording time. Again, larger supported cards were either over C$300, or not readily available. I’d already lost several days, so in the limited time remaining, that one card would have to do.
Although the briefing mentioned that a battery grip was available, and I asked if that could be included with the loan (“No”), battery life quickly became an issue, with the camera powering off after just a few minutes of use. Luckily, I could use wall power for most scenes.
Only when I tried to import the first test scene into Final Cut did the most significant issue arise – there is no B-RAW input filter for FCP. That didn’t seem to be a major obstacle, as I was happy to do that work in DaVinci Resolve. However, outputting 4K DCI required DVR Studio. As I said in the video, that’s not an issue if you purchase the camera, as a license for DVRS is included. However, trying to get one to use for this review took over a week. But just to show that the agency was not completely unsympathetic, they did extend the camera loan for a week.
I’m not sure whey they insisted on sending a physical key device instead of an electronic license (and then locking me out when I completed the review). That added further delays with some shipping issues. Again, an arbitrary and strict two week time limit. And the requirement to produce a review of DVRS, which I likely will be completing after the PKD goes back.
So, the workflow was to shoot in segments under 3 minutes (there is one jump cut and one “flow” transition in the conclusion), correct exposure and colour in DVRS, output to 4K DCI ProResHQ and then edit the review in FCP. While I did contemplate creating the review in DVRS, that would put a great strain on my productivity.
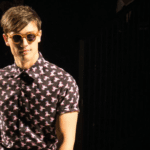
Let me break down the scenes for you. In the studio I wore a black sweater with a white shirt – partly inspired by Tim Cook’s apparel in the recent watch/tablet announcement video. In the Apple video, the sweater’s detail was completely lost in a crush of shadow detail, I wanted to keep some detail on the lit side. I do intend the studio to look a little dramatic, dark and underlit.
The flexibility of shooting RAW and being able to set the ISO, fine-tune the exposure and white balance on import – even before making any colour corrections and grades – emphasizes the great power of this camera. On my iMac I could see the image clearly with accurate colour reproduction and make small tuning adjustments with the appropriate tools, using a waveform and parade scope displays. You can’t do that stuff in camera or in the field.
In the breakfast room, all light comes from the window. I wanted this scene to be a bright scene, in contrast to the studio. I wore the orange vest to see how those bright tones would work. More discussion on this in the DVRS video to come.
The exterior with the blue shirt is all natural light, I’m in the shade and the lake in the background is lit with bright sunlight. The Log setting in B-RAW enabled this scene to work nicely – soft tones in the foreground, and while the background is bright, it still looks like a well-balanced scene. I can’t think of another camera I’ve reviewed that would have provided such nice results, even using a Log profile.
The one candle studio scene worked better than expected, as I say, helped by a 180 shutter and wide aperture lens. Although these scenes were imported into DVRS using the Bmpcc6k input filter, I did not adjust or manipulate them further. They are as “out of camera” as it gets.
I wanted to shoot a scene with the video dynamic range setting, so chose to do that with a green screen. As I said in the video, I challenged this by using a single soft box (I usually light the green curtain independently). In the review I created the key in FCP after adjusting exposure and colour in DVRS. In the DVRS review, I’ll use DVRS to create the key. High resolution and colour accuracy made this a one-click key.
I’m standing in sunlight in the stability scene. In DVRS, I reduced the dynamic range and the sweater’s saturated colour slightly. Alex is a little more stable than most – but still illustrates my point – the lack of in-camera stabilization is not an issue on this camera.
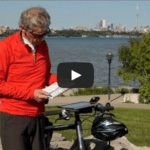
In the canoe, I’m intentionally going in a circle to show both sun and shade in one scene – Kim did not adjust exposure while shooting, nor did I make in-scene adjustments to the exposure or colour in DVRS. This scene looks stable because both the tripod and I are on the same surface. With the battery and recording time limitations, this was the most challenging scene to record.
Although there are a few screens from the Ninja Inferno (like those used to show the settings in the one-candle scene), as the Bmpcc6k does not output the menu to HDMI, the camera’s menu scenes were recorded at 4K DCI 24 frame using a Fujifilm X-H1 with the 7Artisans 60mm macro lens. I have a rails rig with the X-H1 at one end and I mounted the Bmpcc6k at the other, so that they are locked together.
Audio was recorded in camera, using a Sony ECM77 connected via XLR to the camera (they did not provide this adapter cable, I had to buy it). Voice over with the Rode NT USB.
If my review has encouraged you to buy this camera, please consider my B&H affiliate link – you’ll pay the same low price, but I’ll get a small commission to support my channel.
Please post any relevant questions or civil comments either here or on youtube. I do read and reply to all.