The first thing that impressed me about the Nikon Z7 was the viewfinder – it’s bright, crisp and clear, the view feels larger than I expected and the colours are pure and true. And if there’s one initial impression that Nikon needs for this camera, that’s it.
The rest: Nikon’s image quality, colour science, feature set and so on, we can take for granted. But in a high-end mirrorless camera – the viewfinder has to satisfy photographers who are likely coming from an optical viewfinder.
We took the Nikon Z7 on a trip to Japan, Thailand and Cambodia, as well as a wedding in California. We shot over 5,000 images – day and night, inside and outside, in temples and shopping malls, of statues and people in traditional costume. I primarily used the viewfinder. The viewfinder image displayed in the video (recorded with my iPhone) doesn’t do it justice. I found the Z7 to be very sensitive. The image I get is exactly the image I see as I press the shutter, with no lag. That’s extraordinarily pleasant.
The following B&H Photo affiliate links provide a U$ price check for the Nikon Z7. If you use these links to purchase, although you pay the same low price, I will get a small commission, which, along with Google Adwords supports this site and my videos.
B&H Photo Nikon Z7 Body Nikon Z7 Kit


Below is a table of contents for this post. In the body of the post, subheads are linked to the appropriate section of the video . I’ve also produced several more videos featuring the Nikon Z7, which may be of interest:
Best Video Settings for the Nikon Z7
Nikon Z7 vs Z6 – a detailed comparison
Contents
Design
LCD and Viewfinder
Connectivity
Shutter Operation
Size, Aspect, Quality
Exposure
Focus
Manual Focus
Focus Bracket
White Balance and Colour
Stabilization
Drive Modes
Video
External Monitors and Recorders
Rolling Shutter, Stabilization
Low Light Video (one candle)
Lenses
Review and Retouch
Menu
Battery
Conclusion
The Z7 uses a full frame – 36mm by 24 mm – sensor with a 46 megapixel resolution. That’s impressive too.
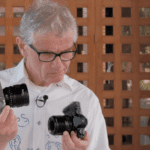
Nikon loaned me the Z7 with the 24-70 kit lens, which uses the new Nikon Z mount. Nikon also lent me the 35mm F1.8 prime, and the FTZ adapter, which enables legacy F mount lenses to be used with Z mount bodies. The Z mount is a new larger lens mount, not the Nikon F mount used in their DSLR models. The 24-70 lens has one slightly annoying characteristic. It must be rotated out before it can be used. Otherwise it’s a solid performer for this camera. I do suspect that eventually Nikon will release a line of premium Z lenses.
The Z7 has a simple, somewhat utilitarian and understated design. It’s a magnesium alloy body with black plastic accents and covers. The red swoosh, usually in front, is on the side. It is smaller and lighter – about 2/3 of the weight of the D850 – it’s 46 megapixel DSLR brother. The body weighs 585 grams (21 ounces). And it’s weather-sealed – the sealing components seem to be robust by those who’ve dis-assembled the camera. The standard 0 to 40 Celsius (32 to 104F) operating range.
For my hand, the fit is superb. The grip is contoured for a very solid hold with my right hand, the thumb grip is perfectly positioned. My index finger falls naturally on the combined On/off and shutter button.
It’s surrounded by a video record button, ISO and EV adjustment buttons, which are easy to find with my eye on the viewfinder.
There’s a front dial under the shutter button, and a back dial hangs out over the back right corner. They serve a variety of functions.
The mode dial is on the left – it has a push to turn button, I prefer push to lock/unlock. It’s a very simple layout – Auto, Program, Shutter and Aperture priority, Manual and three presets.
I found the dual custom function keys, beside the lens on the right side to be innovative and useful. They’re under my third and fourth fingers, which, although it does require some new motor skills, combines with the other right side buttons to provide the best single hand controls I’ve seen.
The stills/video switch is beside the viewfinder, and the AF button is a little further to the right. Then down to the focus position joystick, the I button and the control pad. One physical button position I didn’t expect was the menu on the right – it’s typically on the left on Nikon bodies. But with an electronic viewfinder, the right makes sense, so you can get to it easily with your eye on the viewfinder. So, thanks, appreciated.
In fact, nearly all buttons are on the right side – which really makes sense – only play and delete are on the left side. Again, a logical position. There’s a card door on the right. The Z7 has a single XQD slot. I find XQD cards more solid and reliable than SD. For the moment anyway, they support higher recording speeds. Of course, that comes at a price.
The battery door is far away from the tripod mount, so changing batteries won’t require you to remove the quick release plate. A plethora of ports on the left side – and an HDMI cable clamp is included, that’s appreciated by those using external monitors or recorders. These covers are weather sealed, and marginally awkward. Mic in, headphone out, USB-C and the slightly larger and more reliable HDMI mini, not micro port.
Interestingly, there’s a control panel display. While it’s useful, displaying exposure settings, battery status and remaining card space – all of that also appears on the viewfinder and the LCD or monitor. It would be more useful if some – like battery status and available card space – were displayed when the camera is off, but it’s blank when powered down. On the setup menu there’s a setting to control the brightness of the display, or to disable it.
The viewfinder’s diopter adjusts using a pullout dial. It adjusts enough for my prescription. On the other side, the monitor mode button selects the display, or switches automatically when the viewfinder senses an object.
The 3.2 million dot LCD swivels up and down but not forward. And thoughtfully, there’s enough clearance to do that even when it’s mounted on a tripod release plate. This is a touch screen, for tap and snap, touch focus – as well as changing settings and using the menu. There’s no option to use the screen as a touch pad while shooting with the viewfinder.
The Z7 has Bluetooth and using the free Nikon Snapbridge app, can synchronize time and location with a smartphone and the camera. And transfer photos automatically – a feature I found quite useful while travelling – posting to Instagram while having a snack.
The shutter’s fast response is sadly offset with a very slow review. It’s not on by default, and it’s found on the playback menu. “On” displays on either the monitor or viewfinder. Monitor only doesn’t display a review image when shooting with the viewfinder.
The Z7 uses a full mechanical shutter – seen here in a one second exposure. There is no explicit shutter control, but silent mode changes to electronic shutter. It is fully silent. Then in custom settings d5, an electronic front curtain control – let’s get these together in one place. The fastest electronic shutter speed is 1/2000.
The Z7 has three sizes for JPEG, and independent settings for RAW – 45, 25 and 12 megapixels – but you didn’t buy the Z7 to take low quality images. Although, if you’re shooting RAW a small JPEG helps conserve card space and is better suited to social media posts.
In addition to uncompressed 24 bit TIFF, there are three quality settings – basic, normal and fine, each with a star variant to maximize quality. All of those can be combined with RAW.
As you can tell by the price, this is a high end camera – and I found that I needed to take a little more care to adjust the exposure and get the focus just right. These high resolution images are not very forgiving and I did not find it well suited to casual snapping.
Before setting the exposure, select the meter mode for the scene – press the I key on the right side, or touch the I on-screen button. This overlay menu is touch navigable. In addition to the three standard meter modes – matrix, centre-weighted and spot – a very useful highlight mode, makes sure that bright objects are never over-exposed.
In operation, I found I wanted to change meter modes frequently, usually to take advantage of highlight mode – so I assigned it to one of the function buttons on the right side of the lens mount. That simplified access for me – without repositioning my hand or eye.
The exposure mode dial is remarkably simple – push the lock button and turn to select. Let’s start with program, which automates both the shutter and aperture.
Depending on lighting, you may need to adjust the ISO sensitivity by pressing the ISO key on top and turning the top dial. Automate this using the front dial – which switches in and out of auto mode.
Program mode is flexible – turn the top dial – Nikon calls this the main command dial – for other combinations that also provide a proper exposure. To lock the exposure, don’t look for an AE Lock button – press the joystick. AE-L appears bottom left. There’s a dedicated EV button, then press and turn either front or rear dial. Five stops up and down with a numerical readout at the bottom of the screen. There’s a custom button option b2, when “on” is selected, the rear dial adjusts EV without the need to hold the button – although now there’s no EV numerical display, just the meter screen right. With “reset” the EV value resets to 0 when the camera is powered off.
In shutter priority the rear dial selects the shutter speed from 30 seconds to 1/8000. A flash sync setting of x200 is available.
In aperture priority, the front dial adjusts the iris. On the 24-70 lens the aperture opens to a constant F4 and closes to F22.
In manual both controls are available. The screen right scale now displays the exposure, to guide you to a properly exposed setting. Manual enables a timer mode, which opens the shutter with the first press and closes it with the second, as well as bulb mode – the shutter stays open as long as the shutter is pressed.
The viewfinder and the monitor display the image that will be taken. A custom setting (D8) over-rides some settings, including colour picture control and white balance. By default , the display shows the widest aperture, so an F22 image has a much deeper focus field than the preview. Assign one of the custom buttons to “preview”, then press it to see the actual focus result.
ISO can be set from 64 to 25,600. Then the extended mode adds 1 stop below 64 … and 2 stops above. The Auto ISO settings include a maximum both without and with flash, and a triggering shutter speed. While using AutoISO settings, the Z7 often took images at the highest available ISO – 25.6. Although the images are free of colour shift, they are very mushy.
I’d always prefer to make dynamic range adjustments in Lightroom – but Nikon provides two options for in-camera settings. Active D lighting offers four dedicated as well as an auto mode. Although they should be adjacent, you’ll find the HDR mode a few screens down. In addition to auto, up to 3 stops of range can be set.
The focus system is also quite straightforward. On the I menu, you’ll find Single, manual and continuous – where the camera continues to focus while the shutter is soft-pressed. And in video mode, full-time, which does the same thing without requiring the soft press.
Soft press the shutter, or use the dedicated AF-on button to focus. Focus is fast and confident. In single focus, four sizes are available. Wide – large and small, single point and pin point. Using either the joystick or the control circle, single point can be positioned on a 29×17 grid which covers nearly the entire screen with 493 points. Pinpoint, which covers a slightly smaller area has more points than I care to count. And pin point is accurate to very small objects at the edges. Nice!
If that feels like too many points to work with – custom setting A5 jumps over every other point for faster navigation. Of course, there is the touch screen to select any point quickly. That works well in video mode also for a rack focus while recording – although the transition is not quite as smooth as I’d like. Auto area is the fully auto mode.
This mode includes object tracking, which I tested (in the video) with my Playmobil train. And switched to continuous mode. In this mode, press OK for the selection square, press OK again to track the object. Which it does.
However, it doesn’t focus. Even when I press the AF-On button. In burst mode, it does focus while shooting. With custom setting a1 on focus, you can hear it’s not updating as quickly as the burst speed. I set a3 to quick, but it doesn’t change.
There are two ways to get to manual focus, either using a switch on the lens, or using the I menu. With manual focus on screen indicators appear bottom left. There’s a dedicated AF-On button for back focus, you’ll have to use the custom setting menu option A7 to select AF-On only to disable to shutter autofocus. I much prefer when manual focus deselects the shutter AF and AF on works in manual mode.
Focus bracket, or focus shift to use the Nikon term, can be used to create a series of images with changes in focus. This can be used either to make sure you have a sharp image of an object that’s difficult to focus, or to create a focus stack. The closest tulip is about 40 cm, the 24-70 is at 50mm, F4, and the farthest tulip is about a meter away.
After some trials, I found that 20 images with the maximum step width of ten would cover front to back. With 0 interval the shots are continuous. I set peaking stack image to on. And then started. Although you hear the shutter click, there is no screen display while shooting. Reviewing the images shows the focus progress. Press “i” and select display peaking stack image to see if all objects were focussed. Then you can take them to Photoshop to create the stacked image.
The “i” menu has white balance presets – and there are more than the usual. There are three variations of auto, each of which include colour shift options. A second auto for natural light, and then the standard set – but even here fluorescent has five variations.
The Kelvin settings are more precise than most, and there are five custom presets. Capturing a custom preset is relatively straightforward. Press and hold the OK button to enter preset capture mode, position the square over a neutral white reference and press OK again to capture. All set. I’ve been showing this using the full menu, but you can shortcut this using the front and rear dials – for an expert mode.
With white balance set, select a colour profile – Nikon calls these Picture Controls. There are a variety of presets to choose from, including neutral and flat, which would be useful for video to be colour graded – and then an Easter Egg feature – 20 different effect modes which may or may not appeal to you. All of these also have sub controls to customize the adjustments to your taste. And again, Nikon offers more control than most – three types of sharpening as well as contrast, brightness, saturation and hue. The adjustments, are relatively meaningful. Of course, these settings are applied only to JPEG files, so you’ll always have a clean RAW version.
Nikon promises five stops of five axis stabilization. There’s a menu setting – vibration reduction – with three settings. Normal, sport and off. Handheld, and framing with the LCD, not the viewfinder, this is off at 70mm – that’s my inherent shake. Switch to DX crop and it’s pretty obvious. Turning vibration reduction On gives an excellent impersonation of a tripod. Then I started snapping and was able to shoot without blur to one half second – that’s about five stops from the one sixtieth I feel is my minimum. The manual says sports mode is when both you and your subject are moving.
From the dedicated drive mode button set a 2 to 20 second timer. Then dig down to custom setting c2 to select 1-9 shots and an inter-shot delay up to 3 seconds. That should enable you to get in the shot and make sure everyone’s eyes are open. At D4, if all you need is a shutter delay, that can be set from .2 to 3 seconds, but isn’t as easily activated or disabled.
There are continuous low, with 1-5 frames per second, and high, which is rated for 5.5 images per second. Using extended high, with manual exposure and focus settings, and saving fine star jpegs, in the bottom right, the remaining frames switches to buffer status when I start shooting. The Z7 recorded 9 frames for about 3 seconds before the buffer fills and slows to about 4 per second. In 2018 for a camera in this class, that’s disappointing.
I tried with the silent shutter – it’s silent, and there’s no onscreen indication other than the buffer to show that you’re shooting. That runs about 8 per second for 3 seconds before slowing to 4. I went back to high, which holds 5 and a half frames per second for 10 seconds before slowing to 4.
One setting I don’t understand is the limitation of 200 images in burst mode. I know that you will want to explain or justify this – but this unnecessary limitation is unique to Nikon. So let’s put in a request for the upgrade, whether it’s the Z8 or Z7 mark 2, to include a larger buffer and no limitation.
In a camera which requires me to create focus stacks and panoramas manually, it’s odd to find multiple exposure, one of the easier tasks to do in post. Should you decide to use it, Nikon provides more capability than the competition. Choose to take one or a series, with from two to ten images. Four overlay modes, the ability to save the individual images and overlay to see the images as you proceed.
Then I discovered an easter egg. When you combine multiple exposure with continuous, the images are taken at burst speed, creating an interesting superimposed action series.
The interval timer is also full-featured. With a start time and date, interval lengths up to 24 hours, up to ten thousand minus one intervals, with up to 9 shots each and the ability to create a dedicated folder for the images.
Oddly found on the stills menu, and not available when an external monitor is connected, there’s also a time lapse movie mode – again with a full set of features – including output up to 4K 30 frames.
I’ve always felt that DSLR style cameras are not totally happy shooting video. Video mode on the mirrorless Z7 is activated by turning the selector. There’s an aspect change but no crop in video mode. Video mode has an independent menu, and many of the settings, like white balance and picture control can either be the same as photo or independent. That also applies to the shutter, aperture, ISO and meter mode. Switching between video and stills, each retains their own settings. That’s thoughtful engineering.
Custom settings G1 and G2 customize the I menu and the control keys for video. In video mode, image area selects either FX – the full sensor or DX for a 1.5 crop, useful to extend your zoom. Press the video record button to record. Recordings are limited by card space or 30 minutes.
Resolutions up to 16×9 or UHD 4K with frame rates up to 30 are available. In HD1080, 120 and 60 are supported, as well as three slo motion modes. Note that 120 frames and the slo mo modes force the DX crop. In HD, there are two quality settings, which equate to data rates.
The 4K data rate is about 120 Mbits. At HD high quality is 25 Mbits, while normal records at 13 Mbits. Both MOV and MP4 are available – both use the H.264 video codec. The difference is audio – MOV uses PCM, MP4 uses AAC.
It would be nice if the shutter button would start and stop video recording. But I should note that custom setting G3 configures the OK button as record start stop. And for all the things that Nikon did right for video mode, they didn’t go all in – there are a lot of essential features missing or incompletely implemented.
The good – there’s a fairly extensive time code function. There’s focus peaking for manual focus – configured on custom setting d10. There are four colour options and three sensitivity settings. But it has to be turned off to access the limited zebra function – G6, highlight display, using RGB instead of the more standard waveform values. 224 is about 100%. Both of those can be assigned to the “i” menu, focus peaking to a custom button.
Another handy customization is power aperture open and close – which can be assigned to the function buttons beside the lens.
HDMI, external monitors and recorders
In general, cameras with an HDMI output have a setting to select whether the output is a clean, recordable feed or includes the menu and screen overlays. That’s not available here – in video mode, only a clean feed is available. That means most of this section is shot from the LCD screen.The HDMI options – most of which apply specifically to video, have been relegated to the setup menu. The HDMI output follows the movie menu frame size frame rate setting. These options can lower but not raise the resolution. So when frame size is set to 4K, you can use this setting to force it to HD. But not the reverse. In the advanced options, the output data depth can be set at either 8 or 10 bits. Using ten bit for external recordings prevents some size and rate options from recording internally. Not sure why this might be an issue when the Z7 uses XQD cards.
Also available only for external recording is Nikon’s NLog format. This also over-rides the ability to record internally. That’s unfortunate. NLog has a minimum ISO of 800 and adds 2-3 stops to the effective dynamic range. Nikon has not yet provided a LUT for this feature. The view assist setting changes the response of the LCD so that it doesn’t look washed out while using NLog. Note that if you do plan to use an external recorder, set C3, the power off delay, standby timer to no limit.
Video Stabilization, Rolling Shutter
The same vibration reduction for stills is also available, with an independent setting, for video. And there’s also an electronic VR setting. With the same handheld shot and DX crop you saw in stills, here’s video with electronic VR. Solid.
To evaluate the Z7’s susceptibility to rolling shutter, I turned both vibration reduction and electronic vr off – just so they’re not trying to compensate. With 4K video mode, the Z7 shows quite a bit of bending as I pan back and forth. Then switching to HD 1080, no so much – so if you need a fast pan …
Face detection is enabled on custom setting A4, and works with auto area autofocus continuous in stills and full time in video. I found it works well. Now, it does feel a little bit like cheating to use a F1.8 lens for my one candle test shot. But, it is all part of the Nikon Z system.
So shutter 1/60th, F1.8, I captured a custom white balance as the Kelvin setting only goes down to 2500, and a candlelight setting is typically around 1800. I’m using the flat colour profile. This is ISO 6400 – you’ll see some noise in the bottom left, Then ISO 12,8000 looks like … well, noisier The maximum is 25,600, which while noisy does not introduce a colour shift.
There are not many cameras that can take stills without interrupting a video recording, but the Z7 can. Just press the shutter button. The touch shutter doesn’t work in video mode. The only limitation – these images are 16×9 video aspect 8 Mp images, even smaller than small JPEGs.
The Nikkor 24-70 F4 S is a solid feeling unit, tipping the scales at 500 grams (18oz). The filter diameter is 72mm. Not sure what S represents – but I suspect it’s a generic stabilization badge. It’s a constant F4 to F22 The body and lens combination offer 5 axis stabilization. Nikon indicates that’s lens dependent.
Closest focus 30 cm, and if you can work at that distance, the bokeh is quite pleasant.With custom setting F2, it’s easy to overlook the last control – which selects the function of the lenses focus ring – it can adjust focus, aperture or exposure compensation – nice! G2 has independently settings for video – the selection here is called power aperture – the adjustments are nicely smooth. In both modes with manual focus, it reverts to focus.
Switching lenses in the field with a mirrorless camera makes me nervous, and carrying multiple lenses is a little more than I want to shoulder all day. So I didn’t shoot much with the 35mm. But it is a nice, clean lens. And I guess we can expect all Z lenses to be a good size, this one weighs 370 grams (13oz). There’s a auto/manual focus switch and a focus ring – and this is a full frame FX lens. Filter diameter is 62mm. Opens to F1.8, closes to F16. Closest focus is 25cm. It also supports the ability to use the focus ring for aperture and EV.
In addition to those two there’s a 50mm Z mount. So, for the moment anyway, there aren’t many Z mount lenses. That makes the FTZ adapter a useful accessory if you have existing F mount lenses that you’d like to use, or if there isn’t a Z mount lens suited to your needs. It’s fairly small and light. There are no controls. It extends below the body of the camera, so the tripod mount is appreciated. I tried it out with the Nikkor DX 55-200 zoom.
As expected as you can see on the right side, the Z7 recognizes this a DX lens and crops accordingly so there’s no vignette. Aperture, including power aperture in video, works as expected, even while recording, a pleasant surprise. Focussing is slow with some hunting. The pinpoint mode doesn’t work nearly as well as with the native Z mount lenses.
Only Nikon provides both a playback and a retouch menu. The playback menu includes settings for the playback display options – to view photo details – but I’m not sure why these aren’t on by default.
The retouch menu, in addition to the usual like crop, resize and red-eye removal includes distortion control to adjust the effects of wide angle lenses and perspective control to adjust the keystone effect. You could easily overlook image overlay which creates a multi-exposure image from two photos. It’s not as full featured as the photo mode version, but still useful.
Then there’s an extensive RAW processing module, which includes the ability to set image quality, adjust the exposure value, select another picture control option, or adjust the active d lighting to modify the dynamic range. This is as good as it gets.
In Lightroom, although the JPEG files are large – I was able to make a wider range of adjustments than is typical with JPEG files. The RAW files enable even more exposure latitude.
Even if you’re not familiar with Nikon’s menu system, it’s logical and well laid out. One issue I have is that the scrolling list on some of the tabs is getting a little long. There are a few settings that aren’t where they should be. And I’m still not sure what makes a setting qualify as a custom setting as opposed to a setup. Like power off delay – that’s a setup feature.
Customization makes it easy to get to your most used features, either with custom buttons or via the I menu. And, if you prefer, you can use My menu to create a custom page of settings. The help feature, while not available for all settings, is useful. But the generic message for a setting that’s not available isn’t. The manual – and there are two available for download – both a user manual and a reference manual – also doesn’t list the exclusions for some settings and features.
For a mirrorless camera, battery life is better than average. I shot a lot while we were travelling, but never ran out of power in a day. A battery charger is provided. The camera can be powered or charged using the USB port.
Nikon has clearly invested the Z7 with excellent quality and good usability engineering – once I had the controls customized, I quickly felt at home, able to make adjustments easily. With the exception of burst speed and buffer, stills features feel complete, but there is room for more capability in the video configurations.
If you have decided to purchase the Nikon Z7, my affiliate links are below. Although you pay the same low price, I will get a small commission, which, along with Google Adwords supports this site and my videos.
B&H Photo Nikon Z7 Body Nikon Z7 Kit

I enjoy interacting with you, so I reply to relevant questions and civil comments. Go out and shoot until your memory card is full and your battery is empty. And if this blog and my reviews please you, please enter your email address in the sidebar to have my posts sent directly to your inbox.