A few weeks ago I purchased the ATEM mini to use for live broadcasts. I was astounded by its capabilities, and thought I share a few of the operational secrets I’ve picked up.
I found the ATEM mini easy to use, but when using only the physical switcher, it’s quite limited. For those who have not used switchers, it can be confusing, so this video is a high level functional overview of the switcher, and the desktop software to manage and customize the physical controls.
This video is a solo effort, and was shot in my studio in Toronto, over two days of shooting during the week of July 6th, 2020.
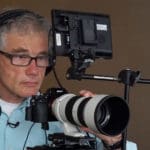
The main camera is the Nikon Z7 with the 24-70F2.8. The Sony A6300 with the SEL30M35 macro lens is used for the mountie with the DSC chart. The Fujifilm X-H1 with the 16-55 provides the inset shot of the ATEM mini. The mini’s output is recorded on an Atomos Ninja Inferno.
Audio was recorded using a Deity S-Mic 2S mixed through the TASCAM DR-70D connected to the mic input of the Z7, then fed with HDMI to the mini. An Audio Technica ATR55 shotgun is the direct mic input to the mini.
Stills and lower thirds are created in Photoshop, using templates provided by Jeff Clarke. Theme music composed by Adam Sakiyama. The black and white photo of me was taken by David Anthony Williams.
I used the OneTakeOnly teleprompter with an iPad, using a bluetooth keyboard and remote to control playback.
Edited on a 27″ iMac using Final Cut 10.4.8. Output to HD1080/30.
I will read and reply to all relevant questions.
Maartech’s production essentials (affiliate links) https://www.bhphotovideo.com/c/browse/maarten-s-gear-guide/ci/43533 https://www.amazon.com/shop/maartenheilbron (You pay the same low price, etc.)


