You may have trouble understanding photographers. Even my family and friends often ask when I’m going to product videos in English. In this video, I review and explain the terms that photographers use when we talk about cameras – the settings that control exposure.
In part one I spoke about hardware terms in cameras. In this post, I’ll go over the terms used when setting the exposure. Honestly, the terms used for setting exposure are all confusing, even I sometimes use them inappropriately.
First – auto mode – because many of you feel that you’re somehow cheating or not using the full potential of your camera if you use the auto settings. I don’t agree with that.
I think auto mode does take advantage of your camera’s capability to take pictures. When the camera manages exposure, focus and colour balance, you can concentrate on timing and composition – things the camera can’t do.
Sometimes, you may not agree with the camera’s computer’s decisions. And that’s when you’ll want to make manual adjustments.
A camera’s settings for exposure are nearly the same on all models, although the way you make adjustments will be different, and not just between manufacturers, but also from model to model. That’s something you’ll discover in the manual.
Before making any photographs, I check the camera’s quality setting – I want to make sure that I’m saving files at the highest possible resolution, both for JPEG images and for RAW files. By default many cameras don’t have the highest setting enabled. It may be set to normal JPEG, when fine or superfine settings are available – that enables you to take full advantage of your camera.
Saving RAW files provides a greater latitude for making adjustment in your photo editing software. But, they’re useful only when you’re not be happy with the image’s exposure or colour rendition – and you’re going to make adjustments later with your computer. If you’re not doing that, RAW just eats up card space.
There are three aspects to exposure. Two control the amount of light going to the sensor. First, the size of the opening, called the aperture;
second, the length of time the camera is open to let light in, called the shutter duration. On some cameras, the settings are displayed on the dials and the lens. Sometimes on a panel on top. Mostly, they’re displayed on the screen.
The shutter – like a shutter on a window – keeps light from getting to the camera’s sensor. The shutter duration setting determines how long the shutter is open. While the shutter is open, light is going to the sensor. You need the right amount of light – but while the shutter is open things may move – that includes the camera and your subject.
For most of the typical shutter duration settings, the number is a fraction – when the dial or display says 125, that’s a duration of 1/125th of a second. When you change the setting to 500, the duration is shorter – 1/500th of a second. A bigger number is a shorter duration. A shorter duration will freeze the action, eliminating the blur created by the photographer moving the camera. Although it varies by focal length, it’s a worthwhile experiment to see how steady you can hold the camera at longer shutter durations.If you go the other way, eventually, you will get to a duration of 1 second and longer. Longer durations will blur moving objects – but you may need a tripod to hold the camera steady for pedestrians or waterfalls.
Aperture, from the Latin word for opening, is expressed with F numbers. It is the measurement of size of the opening on the lens. Again, confusingly, a larger opening is a smaller F number. So F16 and up is a small aperture; F4 and down is a larger aperture. Both aperture and shutter duration control the amount of light getting to the camera’s sensor.
The word “stop” or “F-stop” is used to describe the difference between 2 aperture settings or shutter durations. In photography, one stop changes the light by a factor of 2. A shutter duration of 1/500th is one stop less than 1/250th, and two stops less than 1/125th. Aperture is less straightforward. One stop more light than F8 is F5.6, one stop less is F11. For both of those, cameras can make adjustments at 1/3 stop increments.
The third exposure adjustment is electronic and is called eyeso. This term was originally used to describe the sensitivity of film to light. In those days, the eyeso standard was the same from one film manufacturer to another. Those same numbers are now been used, somewhat inappropriately, to represent gain or amplification applied to digital sensors.
The less light you have, the larger the eyeso you’ll need to compensate. And here’s a tip – it’s always better to add light than to turn up the eyeso. Higher eyesos mean more noise in the image – but these days cameras can use quite high eyeso numbers – like 3200 – and still keep noise to a reasonable minimum. Again, it’s worthwhile experimenting to determine your tolerance of your camera’s higher eyeso settings.
Nearly all cameras can manage all three of those settings automatically by evaluating the amount of light coming in, and then making the appropriate adjustments. Using the camera’s mode dial, you select which the camera’s computer controls. Modes dials often have a full auto – usually green – mode.
Then there are the P, A, S and M modes. P stands for program, which automates both the shutter duration and aperture. Many cameras offer program shift. Turning one of the dials will offer alternate combinations of shutter and aperture. But that won’t make the picture darker or lighter – for that you’ll need to adjust the exposure compensation, which is sometimes a dial, sometimes an on-screen control. Exposure compensation, sometimes called EV, is also measured or controlled using the stop terminology. Beware, exposure compensation is not a fourth exposure variable. It makes a behind-the-scene adjustment to aperture or shutter duration.
On the mode dial, S means shutter priority – you set the shutter, the camera selects the right aperture. A standard shutter speed is 1/125. While a slower shutter – a smaller number – will let in more light, it means that there’s more chance of blur. If your photos are blurry, it’s either because the shutter is too slow, or the focus is off. Not that either of those is necessarily a bad thing. To stop action at sporting events, you’ll want a shutter speed about 1/1000 or faster. And that’s typically when you want to use shutter priority mode.
A means aperture priority – you set the aperture, the camera sets the shutter speed. Many photographers use A mode as their default. Larger apertures- smaller F numbers like F4 or less – have a smaller depth of field. That makes the background of a portrait out of focus, which draws attention to your subject. Smaller apertures like F11, offer a larger depth of field – useful for landscapes. Although it seems counterintuitive, if you want to capture clear photos of lights in a dark scene, you want a small aperture.
There are cameras, including someFujifilm models, that don’t have a mode dial, making the process slightly simpler and more intuitive. Rather than selecting a mode, you just change the setting you wish to control.
After setting the aperture and or shutter, finalize the exposure with eyeso. Typically, you want the lowest possible eyeso that yields a good exposure. The higher the eyeso, the more noise – random bits of colour – because of the amplification. Scenes with less light will require higher eyeso. But most new cameras have auto eyeso, which increase the eyeso as required. I find that a most useful auto exposure control, as I can choose both the aperture and the shutter speed I want, but still have auto exposure. Typically you set the minimum, maximum and the triggering shutter speed – so that if – in P or A mode – the shutter speed goes below your setting, the eyeso will increase.
But – what is a good exposure? You can usually tell by eye, but the camera will have one or more tools to assist. The camera has an exposure meter, which by default meters the entire scene, usually with a technique called matrix. Centre weighted and spot offer increasingly smaller and selective areas. By selecting a smaller area, you can prioritize the exposure to a specific area of the scene. The camera uses this information internally to adjust the exposure. Switch to M for manual exposure – where you adjust both shutter and aperture – to see the meter reading.
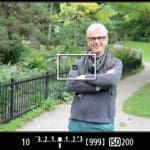
It’s often (like on Sony models) a number at the bottom of the screen. On a Nikon model, it’s usually at the bottom of the viewfinder, on the LCD or the info display on the monitor. With Fujifilm, it’s mostly screen left.
In M the exposure compensation doesn’t work, as there is no longer an exposure setting for it to adjust. The meter shows how far under or over the ideal exposure you are. One more exposure measurement tool is the histogram- you may need to switch display modes or activate it using the menu. The ideal exposure centres the display. But this is just information you can use as a guide – you decide when the image should be lighter or darker. It’s a guide, not a dictator.
Summing up – don’t be afraid to use the Auto mode – and remember that P is also fully automatic, for exposure anyway. Then use A for portraits, S for sports or fast action. But the most important photography skill – the one that can’t be automated – is composition, creating a pleasing image that tells a story, and timing – capturing the decisive moment. Use the auto modes look after technical details while you concentrate on those fundamentals. Until you can see that the camera isn’t getting the image that you want.
In the third part of this series, I’ll talk about colour, the adjustments you can make to control your camera’s colour science and create images that please you.
You can improve your skills by making lots of images – keep going until you drain your battery and fill up your card. Practice before you get to your daughter’s first football game, or your weekend in Paris. As always, feel free to post relevant questions and civil comments.


